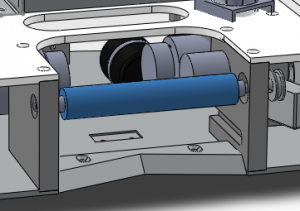
In theory, the dribbler is just a rotating rubber shaft. In practice, making this seemingly simple component is not as trivial as it might seem.
- First, we need a metal inner shaft. The ends of the metal shaft must fit perfectly into a couple of ball bearings. There should also be a groove along the length of the shaft to keep rubber in place. As those requirements are fairly specific, it means that the metal shaft has to be lathed manually.
- Secondly, we need to pick a suitable type of rubber coating. It must be easily moldable upon the shaft and “sticky” enough to grip the ball. Following the advice of the course supervisors, we used Dragon Skin silicone.
- Thirdly, the rubber must be cast onto the metal shaft. This requires preparing three additional components – a properly-sized tube and two caps on it, shaped so that they would hold the shaft right in the middle of the tube. Making the caps meant some more lathe-work for Taavi.
- Once the mold is done, the silicone (which comes in two separate components) is mixed, cast into the form onto the shaft, given several hours to harden and taken out of the form, hoping no ugly bubbles or unnecessary objects got caught in it during casting.
- Finally, the shaft must be mounted into the ball bearings and geared to a motor (which, in turn, has to be mounted appropriately and connected to a pin of a microcontroller board).
The video below illustrates the functioning of a completed dribbler: