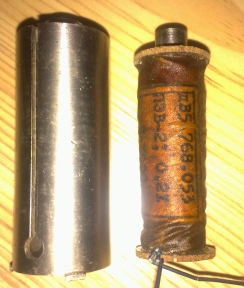
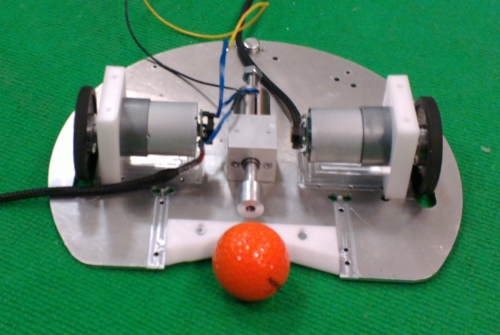
A coilgun, is the part responsible for kicking the ball. As you might remember from an earlier post, it consists of a solenoid (coil), a capacitor, a metal bar, a spring and a controller circuit.
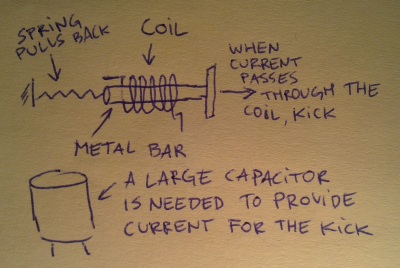
The Theory
There are thousands of tiny details that must be decided upon in order to make a coilgun: you need to choose the material of the metal bar, the force of the spring, the parameters of the wire comprising the coil, the diameter and number of turns of the coil, capacity of the capacitor and its operational voltage. Ironically, despite the abundance of those details, in the end there is just one simple thing that matters: the coilgun must kick the ball strongly enough to send it to the opponent’s goal.
Understanding how each of the above parameters influences the strength of the kick requires patience and a solid knowledge of high school physics and beyond. We won’t go into this here, but here’s a brief overview of the main issues that matter:
In order for the kicker bar to jerk strongly enough, the coil must produce a strong magnetic field. In order to produce a strong field, strong current must flow through the coil, the coil should have many turns and the turns should preferably be small. In order to produce the strong current over a long wound wire we need higher voltage and a large capacitor.
On the other hand, an excessively strong current would melt the wire, and excessively strong voltage would produce sparks, and an excessively large capacitor would be heavy, expensive and dangerous. In the end, there is a kind of balance between “small and light” and “strong and heavy”.
Although in principle it should be possible to come up with a “theoretically perfect set” of parameters which result in the lightest possible, yet functional coilgun, we went along a simpler route of reusing the practical knowledge of our predecessors and intuition:
- We use a 1500uF capacitor to be charged at 250V. The 1500uF number comes from the fact that such a capacitor was available and the 250V number is related to the coilgun control PCB from the previous year’s Tartu teams, which we could reuse.
- We have a coil wound of 1000 turns made of 0.4mm copper wire. The wire was chosen fairly arbitrarily and the number of turns was selected so that the total coil resistance would be somewhere around 4 Ohm. At 250V this would result in a discharge current of around 60A (a “good current for a coilgun”, according to the knowledge of local gurus).
- The 1500uF capacitor charged to 250V can theoretically discharge at this current for at least 6ms, which turns out to be sufficient for the metal bar to make a strong kick.
The resulting coilgun works fine, but it is so strong that it could have been way lighter. If you, dear reader, happen to be in the mood for doing some exciting physics exercises, I dare you to use science and come up with a better set of coilgun parameters.
The Practice
Unfortunately, we do not have a lot of “in progress” photos of the coilgun making. Here is, however, a nice view of the EKRS robot body together with a coilgun control PCB (same as ours), a large capacitor (ours is slightly smaller) and a coil while it was still being developed:
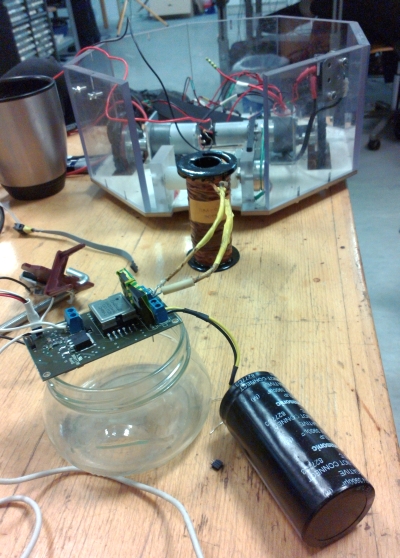
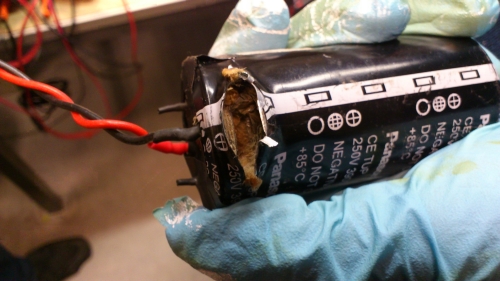
Another Tartu team had their capacitor explode with a loud and scary boom. So, dear reader, please beware: large capacitors can explode easily and violently when connected incorrectly, used with invalid voltage, or damaged:
And finally, here’s a video demonstrating the Telliskivi coilgun in action:
