The task of the vision processing module is to detect various objects on the camera frame. In its most general form, this task of computer vision is quite tricky and is still an active area of research. Luckily, we do not need a general-purpose computer vision system for the Robotex robot. Our task is simpler because the set of objects that we will be recognizing is very limited – we are primarily interested in the balls and the goals. In addition, the objects are color-coded: the balls are orange, the goals are blue and yellow, the playing field is green with white lines, and the opponent is not allowed to color significant portions of itself into any of those colors.
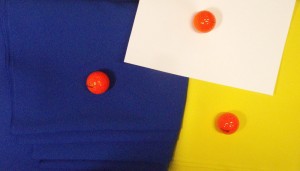
Making good use of the color information is of paramount importance for implementing a fast Robotex vision processor. Thus, the first step in our vision processing pipeline takes in a camera frame and decides, for each pixel, whether the pixel is “orange“, “white“, “green“, “blue“, “yellow” or something else.
Recognizing colors
Firstly, let me briefly remind you, that each pixel of a camera frame represents its actual color using three numbers – the color’s coordinates in a particular color space. The most well-known color space is RGB. Pixels in the RGB color space are represented as a mixture of “red”, “green” and “blue” components, with each component given a particular weight. Pixel (1, 0, 0) in the RGB space corresponds to “pure bright red”. Pixel (0, 0.5, 0) – “half-bright green”, and so on.
Most cameras internally use a different color space – YUV. In this color space, the first pixel component (“Y”) corresponds to the overall brightness, and the two last components (“UV”) code the hue. The particular choice of the color space is not too important, however. What is important is to understand that our color recognition step needs to take each pixel’s YUV color code and determine which of the five “important” colors (orange, yellow, blue, green or white) it resembles.
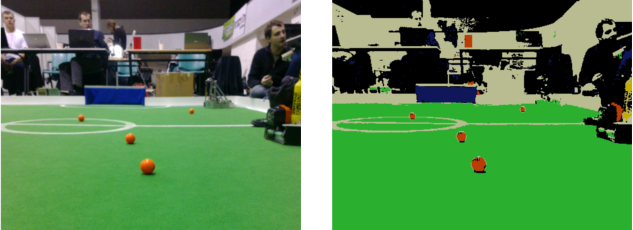
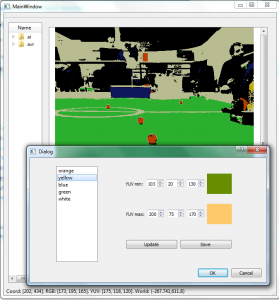
There is a number of fairly obvious techniques one might use to encode such a classification. In our case we used the so-called “box” classifier, due to the fact that it is fast and its implementation was available. The idea is simple: for each target color, we specify the minimum and maximum values of the Y, U and V coordinates that a pixel must have in order to be classified into such target color. For example, we might say that:
Orange pixels:  (30, 50, 120) <= (Y, U, V) <= (160, 120, 225)
Yellow pixels: (103, 20, 130) <= (Y, U, V) <= (200, 75, 170)
... etc ...
How do we find the proper “boxes” for each target color? This task is trickier than it seems. Firstly, due to different lighting conditions the same orange ball may have different pixel colors on the frame.

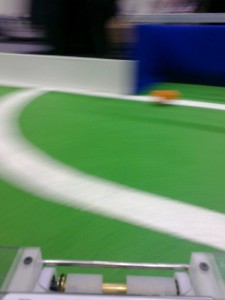
Secondly, even for fixed lighting conditions, the camera’s automatic color temperature adjustment control may sometimes drift temporarily, resulting in pixel colors changing in a similar manner. Thirdly, shadows and reflections influence visible color: as you might note on the picture above, the top of the golf ball has some pixels that are purely white, and the bottom part may have some black pixels due to the shadow. Finally, rapid movements of the robot (rotations, primarily) make the picture blurry and due to this, the orange color of the balls may get mixed with the background, resulting in something not-truly-orange anymore.
Consequently, the color classifier has to be calibrated for the specific lighting conditions. Such calibration can, in principle, be made automatically by showing the robot a printed page with a set of reference colors and having it adjust its pixel classifier in accordance. For the Telliskivi project we did not, unfortunately, have the time to implement such calibration reliably, and instead used a simple manual tool for tuning the parameters. Thus, whenever lighting conditions changed, we had to take some pictures of the playing field and then play with the numbers a bit to achieve satisfactory results. This did get somewhat annoying by the end.
After we have found the suitable parameters, implementing the pixel classification algorithm is as easy as writing a single for-loop with a couple of if-statements. It is, however, possible, to implement this classification especially efficiently using clever bit-manipulation tricks. Best of all, such algorithm has been implemented in an open-source (GPL) library called CMVision. The algorithm and the inner workings of the library are well-described in a thesis by its author, J. Bruce. It is a worthy reading, if you ever plan on using the library or implementing a similar method.
Blob detection
Once we have classified each pixel into one of the five colors, we need to detect connected groups (“blobs”) of same colored-pixels. In particular, orange blobs will be our candidate balls and blue and yellow blobs will be candidate goals.
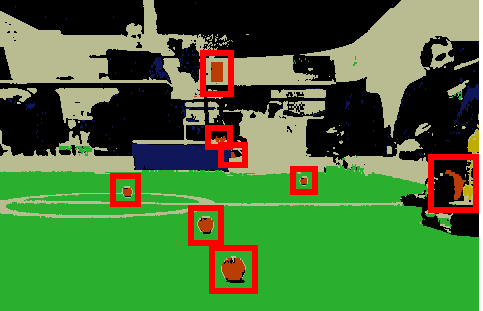
An algorithm for such blob detection is not trivial enough for me to go into describing it here, but it is no rocket science – anyone who has done an “Algorithms” course should be capable of coming up with one. Fortunately, the CMVision library already implements an efficient blob detector (look into the above mentioned thesis for more details).
Why not OpenCV?
Some of you might have heard the name of OpenCV – an open-source state of the art computer vision algorithm library. It is widely used in robotics and several Robotex competitors did use this library for their robots. I have a strong feeling, however, that for the purposes of Robotex soccer this is not the best choice. OpenCV is primarily aimed at “more complex” and “general purpose” vision processing tasks. As a result, most of its algorithms are either not enormously useful for our purposes (such as contour detection and object tracking), or are too general and thus somewhat inefficient. In particular, the use of OpenCV would impose a pipeline of image filters, where each filter would require a full pass over all pixels of the camera frame. This would be a rather inefficient solution (we know it from the fellow teams’ experience). As you shall see in the later posts, all of our actual object recognition routines can be implemented much more efficiently without the need to perform multiple full passes over the image.
Summary
We have just presented you the idea behind the first module of our vision processing system. The module is responsible for recognizing the colors of the pixels in the frame and detecting blobs. In our code the module is implemented as (approximately) the following C++ class, which simply wraps the functionality of the CMVision library.
class CMVProcessor {
public:
  CMVision cmvision; // Instance of the cmvision class

  CMVProcessor(const PixelClassifierSettings& settings);
  void init(QSize size);          // Initialize cmvision
  void processFrame(uyvy* frame); // Invoke cmvision.processFrame()
  void paint(QPainter* painter) const; // Paint the result (for debugging)
};